

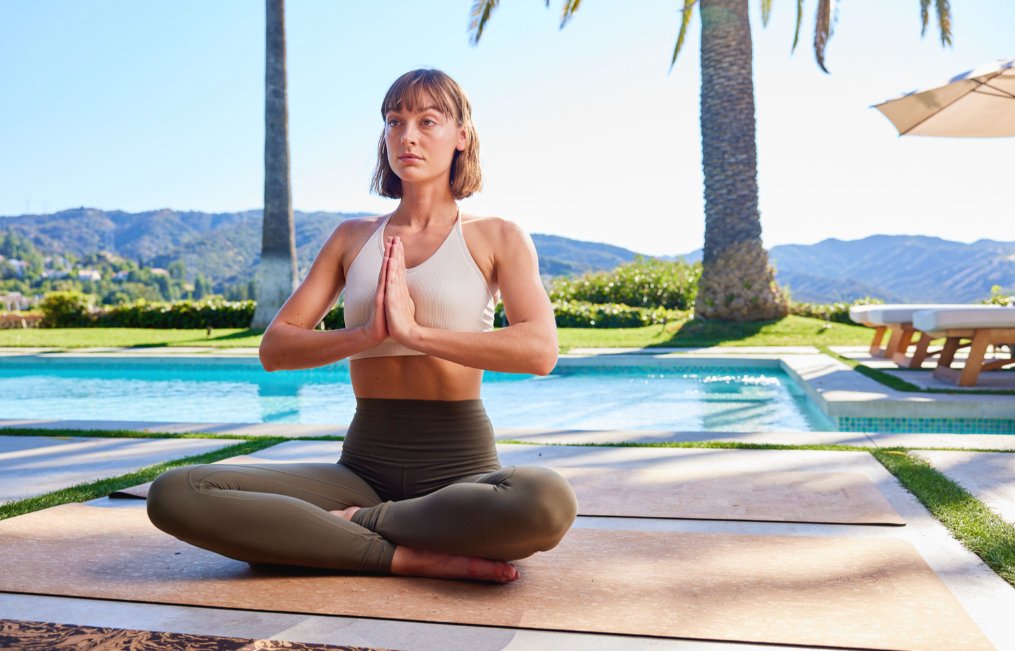
Yoga, an age-old practice, not only improves flexibility and reduces stress but also strengthens core muscles essential for daily activities. Choosing the right yoga mat, especially a cork yoga mat, can significantly enhance this experience by offering the necessary support and grip.[2]The core extends beyond just the abdominal muscles to include the obliques, lower back, diaphragm, hip flexors, hip adductors, gluteal muscles, and pelvic floor muscles, working in harmony to enhance posture, balance, and stability. A reliable yoga mat, like a cork yoga mat, plays a crucial role in performing these exercises comfortably.[1]Engaging in yoga exercises, including specific yoga poses, targets these core muscles, easing daily movements and significantly lowering the risk of injuries. This makes yoga, supported by a durable yoga mat, an essential part of a holistic fitness regimen for both beginners and seasoned practitioners.[1].
With the blend of strength, flexibility, and mental focus, yoga poses offer a comprehensive approach to building core strength. This not only helps in maintaining a strong and stable posture but also contributes to an improved self-perception and confidence in various aspects of life. Using a cork yoga mat can enhance the effectiveness of these poses.[3]The sequences of beginner yoga poses to more advanced stretches ensure a gradual build-up of core strength, promoting overall well-being and enhancing one's ability to handle stress and face challenges with a grounded sense of self. A supportive yoga mat is indispensable in this journey.[3]This article will explore the top 10 yoga stretches that are pivotal for developing core strength, underlining yoga's instrumental role in fostering physical health and personal growth. Incorporating a cork yoga mat into these practices can significantly enhance the experience.
Boat Pose (Navasana)
Execution Steps for Boat Pose (Navasana)
- Starting Position:
- Begin seated with knees bent and feet flat on the floor, hands behind the knees for support. This starting position prepares you for a range of yoga stretches.[6][8][9].
- Inhale deeply, focusing on lifting the chest and engaging the back muscles [6].
- Engage the inner thighs and draw the lower belly in and up, as if zipping up a tight pair of jeans. This action activates the core and prepares you for more advanced yoga poses.[6].
- Entering the Pose:
- Lean back slightly, balancing on the sit bones, and lift feet off the floor to about knee height. This pose challenges your balance and core strength, marking the beginning of a deeper practice.[6][8][9].
- Extend arms parallel to the floor, palms facing up, or hold onto the backs of the thighs if needed for balance. This position enhances focus and stability, essential elements in yoga practice.[6][8].
- For a deeper challenge, straighten the legs, forming a V shape with the body, or use a strap around the soles of the feet to aid in leg extension.[6][8].
- Maintaining the Pose:
- Focus on keeping the spine straight and chest open to avoid rounding the shoulders [6][8].
- Hold the pose for 5 to 10 breaths, working up to longer periods [6][8][10].
- To test balance and strengthen the core further, rock the boat by waving arms and legs or holding a yoga block between the thighs for added resistance, enhancing your yoga practice.[6].
- Modifications and Variations:
- Beginners can modify by keeping hands on the thighs or using a strap for support.[8].
- Advanced practitioners might try variations like boat crunches or holding the big toes in a yogi toe lock for an extra challenge.[8].
- Releasing the Pose:
- To exit, lower the feet to the floor on an exhale and sit up straight, taking a few breaths to stabilize.[6][8].
Benefits and Cautions
- Core Strength: Strengthens the abdominal muscles, hip flexors, and spine, supporting better posture and balance [6][7][9].
- Improved Digestion: The pose can stimulate abdominal organs, aiding in digestion [6].
- Balance and StabilityRegular practice enhances stability and balance, crucial for daily activities and other physical pursuits.[7][9].
- CautionsAvoid Navasana if experiencing issues like low blood pressure, headaches, or during pregnancy. Always consult a healthcare provider before starting any new exercise regimen.[8].
Plank Pose (Phalakasana)
Execution Steps for Plank Pose (Phalakasana)
- Starting Position:
- Begin on your hands and knees, ensuring your knees are under your hips and hands under your shoulders.[12].
- Spread your fingers wide, pressing the palms firmly into the ground [12].
- Entering the Pose:
- Extend your legs back, one at a time, tucking your toes under and elevating your body into a straight line from head to heels.[12].
- Keep your arms straight, and push the floor away from you to lift the chest.[12].
- Maintaining the Pose:
- Draw your abdomen in to engage the core, and ensure your body forms a straight line.[12].
- Keep your gaze slightly forward or down to avoid neck strain, maintaining a neutral spine.[12].
- Hold the position for at least five deep breaths, aiming to extend the duration as you gain strength.[12].
- Exiting the Pose:
- To release, gently lower your knees back to the floor, returning to the starting hands and knees position.[12].
Benefits and Modifications
- Core Benefits:
- Strengthens the core, shoulders, arms, and legs [13].
- Enhances balance and stability, vital for everyday activities and athletic performance [13].
- Improves posture and can help reduce back pain by strengthening the surrounding muscles [13].
- Modifications:
- Beginners may opt for a Forearm Plank or keep their knees on the ground to reduce strain.[13].
- Advanced users can increase the challenge by incorporating leg lifts or alternating between forearm and standard planks.[13].
Cautions
- Individuals with shoulder or wrist injuries should avoid this pose or perform it under expert guidance.[13].
- Those with high or low blood pressure may need to modify or skip this pose.[13].
Prep and Advanced Options
- Preparatory Poses: Chaturanga, Downward Dog [13].
- Advanced Variations: Explore adding side planks or dynamic movements like plank jacks for increased intensity [13].
Side Plank Pose (Vasisthasana)
Execution Steps for Side Plank Pose (Vasisthasana)
- Starting Position:
- Begin in Plank Pose with your wrists slightly in front of your shoulders, ensuring a strong base.[14].
- Entering the Pose:
- Carefully roll onto the outer edge of your left foot, stacking your right foot on top.[14].
- Shift your weight onto your left hand while keeping your right arm along your side or reaching towards the ceiling.[14].
- Maintaining the Pose:
- Engage your core and press your hips upwards to form a straight line from your head to your feet.[14].
- Focus on maintaining balance by gazing straight ahead or towards your uplifted hand [14].
- Hold the pose for several breaths, aiming to build endurance and strength [14].
- Exiting the Pose:
- Slowly lower your raised arm and roll back into the initial Plank Pose [14].
- Repeat the pose on the opposite side to ensure balanced strength development [14].
Modifications and Variations
- Beginner Modifications:
- Advanced Variations:
Benefits and Cautions
- Core Benefits:
- Cautions:
Dolphin Pose (Ardha Pincha Mayurasana)
Execution Steps for Dolphin Pose (Ardha Pincha Mayurasana)
- Starting Position:
- Position yourself on your hands and knees, ensuring knees are aligned under your hips and hands under your shoulders.[18].
- Entering the Pose:
- Press your palms and forearms firmly into the floor. Place the soles of your feet flat on the ground, then straighten your knees to lift your hips up and back.[18].
- Maintaining the Pose:
- Hold the Dolphin Pose for 30 seconds to 1 minute. As you exhale, straighten your knees, press your thighs back, lift your hips, and push your heels down.[18].
- Deepening the Pose:
- Walk your feet towards your torso to stack your shoulders directly over your elbows. Reach your hips towards the ceiling and keep your spine long.[19].
- Engage your legs by pulling up the kneecaps and strongly engage your core to stabilize and support the pose.[19].
- Relax your neck and direct your gaze towards your shins or toes [19].
Benefits and Cautions
- Benefits:
- Cautions:
-
- Avoid this pose if you have high blood pressure or injuries to the shoulder, neck, or ankles.[21].
Modifications and Variations
- Modifications:
- Sequence Integration:
Dolphin Pose, also known as Half Peacock Feather or Peacock Feather Preparation, is a foundational pose for building shoulder strength and flexibility, crucial for more advanced yoga practices.[22].
Warrior III (Virabhadrasana III)
Execution Steps for Warrior III (Virabhadrasana III)
- Starting Position:
- Initiate in Warrior I with the right foot forward [23][24].
- Shift your weight onto the right foot, preparing to lift the left leg [23][24].
- Entering the Pose:
- Extend your left leg behind you while simultaneously leaning your torso forward [23][24].
- Aim to create a straight line from your head to your left heel [23][24].
- Maintaining the Pose:
- Keep your hips parallel to the floor to maintain alignment [24].
- Engage your core muscles intensely to stabilize your balance [24].
- Focus on rooting down through the four corners of your standing foot [24].
- Modifications and Variations:
- Utilize blocks, a chair, or a wall for support if balance is challenging [25].
- Beginners may keep the back leg slightly bent or adjust hand positions for comfort [25].
Benefits of Warrior III
- Physical Strength: Amplifies the strength of glutes, hamstrings, back, shoulders, and legs [26].
- Core Stability: Significantly enhances core stability and balance, essential for everyday activities [23][24][26].
- Mental Focus: Promotes improved focus and concentration through maintained poses [26].
Tips for Stability
- Warm-UpEngage in sun salutations prior to attempting Warrior III to ensure the body is adequately warmed up, making good use of your yoga mat to enhance comfort and grip.[24].
- Foot PositioningFlex the foot of the lifted leg and press through the heel to enhance stability.[24].
- Core Engagement: Continuously engage the core muscles throughout the pose to aid in maintaining balance [24].
This section focuses on the detailed execution, benefits, and stability tips for Warrior III, a pose that not only challenges but significantly enhances balance, strength, and focus. Utilizing a yoga mat, especially a cork yoga mat, can provide the necessary grip and support for this demanding posture.
Crow Pose (Bakasana)
Execution Steps for Crow Pose (Bakasana)
- Starting Position:
- Place the palms shoulder-width apart on the mat [28].
- Bring knees close to the armpits and prepare to shift the body weight forward [28].
- Entering the Pose:
- Press firmly into the palms, look forward, and gradually lift one heel towards the buttock, then the other, balancing on the arms.[28].
- Maintaining the Pose:
- Ensure the gaze is forward, not downward, to maintain balance [28].
- Press knees and thighs into the arms, while the arms push back into the thighs to stabilize.[28].
- Engage the core and thighs to enhance stability, holding the pose for a few seconds to build endurance.[28].
Common Mistakes and Corrections
- Mistakes:
- Corrections:
Benefits and Precautions
- Benefits:
- Precautions:
-
- Avoid if having conditions like high blood pressure, vertigo, or wrist and shoulder injuries [28].
Variations and Complementary Practices
- Variations:
- Complementary Practices:
Warm-Up and Cool-Down
- Warm-Up:
-
- Engage in wrist exercises and warm up the wrists thoroughly before attempting Bakasana [29].
- Cool-Down:
-
- Follow up with Child’s Pose (Balasana) and gentle wrist rotations to release tension [28].
Bridge Pose (Setu Bandhasana)
Execution Steps for Bridge Pose (Setu Bandhasana)
- Starting Position:
- Lie on your back with knees bent and feet flat on the mat, hip-distance apart. Inch your feet as close to your glutes as possible, ensuring your yoga mat is positioned to support your posture, offering a stable foundation for the exercise.[31].
- Entering the Pose:
- Bring your arms alongside your body with palms facing down [31].
- As you inhale, press firmly through your feet and lift your hips, starting the movement from the pubic bone.[31].
- Deepening the Pose:
- Clasp your hands behind your back and press your pinkie fingers into the yoga mat. Broaden your collarbones and roll your shoulders beneath you to open up the chest, making the most of the support your yoga mat provides.[31].
- Continue pressing down through your heels and draw your thighs toward each other, keeping them hip-distance apart. Reach the backs of your thighs toward your knees to lengthen your spine.[31].
- Exiting the Pose:
- Exhale and slowly lower yourself to the mat, releasing your hands [31].
Benefits and Cautions
- Benefits:
- Cautions:
-
- Avoid this pose if you have recent or chronic injury to the neck or shoulders.[31].
Modifications and Variations
- Modifications:
- Variations:
-
- Active Variation: Focuses on strengthening and energizing by maintaining an active lift of the hips without support.[33].
- Supported Variation: Uses props like yoga blocks under the sacrum for a restorative approach, allowing for relaxation and gentle stretching, making it ideal for those seeking a more therapeutic practice.[33].
Preparatory and Counter Poses
- Preparatory Poses:
-
- Cobra Pose (Bhujangasana)
- Upward-Facing Dog Pose (Urdhva Mukha Svanasana)
- Hero Pose (Virasana) [31]
- Counter Poses:
-
- Child’s Pose (Balasana)
- Seated Forward Bend (Paschimottanasana) [31]
Twisted Chair Pose (Parivrtta Utkatasana)
Execution Steps for Twisted Chair Pose (Parivrtta Utkatasana)
- Starting Position:
- Stand tall with legs together and inhale to reach arms straight up over your head.[19].
- Entering the Pose:
- Exhale, sit back over your heels until your knees are at a 90-degree angle [19].
- Pull your hands in a prayer position into your chest [19].
- As you exhale, twist your left elbow across your knees and press your elbow against the outer edge of your right knee.[19].
- Maintaining the Pose:
- Hold while you inhale and as you exhale, twist your torso to the right, bringing your left elbow to the outside of your right thigh.[19].
- Shift your left hip back slightly, squaring off your hips, and bring your knees into alignment.[19].
- Press your upper left arm against your thigh and draw your right shoulder blade into your back to turn your chest to the right.[19].
- Extend both arms, reaching your right fingertips to the sky and your left fingertips to the mat or a yoga block, enhancing your stretch. Utilizing a yoga block not only supports your posture but also intensifies the stretch, making it a valuable addition to your practice.[19].
- Turn your gaze to the sky or the floor [19].
- Bring your hips down lower, lengthen your spine, and deepen the twist on your exhalations.[19].
- Hold for up to one minute, then inhale to return to center and repeat on the other side.[19].
Benefits and Cautions
- Benefits:
- Cautions:
Modifications and Variations
- Modifications:
-
- Stand with your feet hip-distance apart if you have trouble balancing [19].
- Bring your palms together in prayer position if you have shoulder pain [19].
- Place a yoga block to the outside of your foot if you cannot reach the floor, making the pose accessible and enhancing your practice. This smart adjustment with a yoga block not only aids in maintaining balance but also ensures proper alignment, proving its worth in your yoga toolkit.[19].
- Practice the pose near a wall to learn weight distribution [19].
- Lift onto the balls of your feet with your knees bent for a deeper challenge, adding intensity to your yoga session.[19].
- Squeeze a yoga block between your upper thighs to increase thigh strength [19].
Conclusion
Throughout this article, we've navigated the transformative power of yoga poses, specifically focusing on strengthening the core, which serves as the foundation for not only physical activities but also for enhancing mental resilience. The journey from the Boat Pose to the Twisted Chair Pose offers a roadmap to developing core strength, flexibility, and balance. These poses, each with their own set of benefits and modifications, encourage practitioners of all levels to embark on a path that leads to improved posture, reduced risk of injuries, and a better connection between mind, body, and spirit. Engaging in these practices regularly, especially on a sustainable cork yoga mat, will not only enhance your physical health but also elevate your overall well-being.
As we conclude, remember that the essence of yoga goes beyond the physical postures; it's a holistic approach to living that encompasses physical health, mental clarity, and emotional balance. Embrace these practices as part of a wider lifestyle choice towards wellness and harmony. And for those looking to deepen their practice, consider enhancing your experience with the right yoga accessories, such as a durable cork yoga mat. Use code BestCorkYogaMat for 15% off your purchase, inviting both sustainability and quality into your yoga journey. May the guidance provided herein serve as a stepping stone towards a stronger, more balanced you, empowered to face life's challenges with a grounded and graceful stance.
FAQs
What are the top yoga poses for enhancing core strength?
The seven yoga poses that are essential for building core strength, especially for athletes, include practicing on a supportive yoga mat, enhancing the experience and ensuring safety.
- Cat-Cow
- Chaturanga Dandasana (Four-Limbed Staff Pose)
- Virabhadrasana III (Warrior 3)
- Paripurna Navasana (Boat Pose)
- Vasisthasana (Side Plank Pose)
- Eka Pada Utkatasana (One-Legged Chair Pose)
- Adho Mukha Svanasana (Downward-Facing Dog Pose)
Which yoga pose is considered the most powerful for overall strength and health?
There are seven dynamic yoga asanas known for fostering a strong and healthy body:
- Vajra Asana (Thunderbolt Pose)
- Malasana (Garland Pose)
- Mandukasana (Frog Pose)
- Anulom Vilom (Alternate Nostril Breathing)
- Adho Mukha Svanasana (Downward-Facing Dog Pose)
- Bhujangasana (Cobra Pose)
- Uttanasana (Standing Forward Bend)
How can one use yoga to specifically target and train the core muscles?
To focus on core strength during your yoga practice, incorporate these eight poses into your routine, utilizing a durable yoga mat to support your journey.
- Paripurna Navasana (Boat Pose)
- Plank Pose
- Vasisthasana (Side Plank Pose)
- Adho Mukha Svanasana (Downward-Facing Dog Pose)
- Plank Pose with Knee to Arm
- High Lunge
- Bakasana (Crow Pose or Crane Pose)
- Supta Matsyendrasana (Supine Spinal Twist)
What yoga poses are beneficial for building overall strength?
For a holistic approach to strength building in yoga, you can perform poses such as those designed for core enhancement, ideally on a high-quality cork yoga mat for added grip and sustainability.
- Adho Mukha Svanasana (Downward Dog)
- Virabhadrasana I and II (Warriors 1 and 2)
-
Paripurna Navasana (Boat Pose)
It's recommended to balance your yoga sessions by concentrating on different areas, such as the core, lower body, and upper body in alternating weeks, ensuring each practice is supported by a reliable yoga mat.
References
[1] - https://health.clevelandclinic.org/yoga-poses-that-can-strengthen-your-core-muscles
[2] - https://santarosapainandperformance.com/the-5-best-core-strengthening-yoga-exercises/
[3] - https://www.shvasa.com/yoga-blog/7-yoga-poses-for-core-strength
[4] - https://www.majisports.com/blogs/news/10-yoga-poses-to-strengthen-your-core
[5] - https://www.livestrong.com/article/86704-yoga-positions-strengthen-core-muscles/
[6] - https://www.ekhartyoga.com/resources/yoga-poses/boat-pose
[7] - https://www.yogajournal.com/poses/full-boat-pose/
[8] - https://www.verywellfit.com/boat-pose-navasana-3567061
[9] - https://www.youtube.com/watch?v=UHSqdPl2R4Q
[10] - https://www.youtube.com/watch?v=8KsyQvwi85Q
[11] - https://www.yogabasics.com/practice/pose-type/core-strengthening-poses/
[12] - https://www.youtube.com/watch?v=RG4PwUP5njo
[13] - https://blog.alomoves.com/movement/pose-breakdown-plank-yoga-tutorial
[14] - https://www.yogajournal.com/poses/side-plank-pose/
[15] - https://www.ekhartyoga.com/resources/yoga-poses/side-plank-pose
[16] - https://www.tummee.com/yoga-poses/side-plank-pose
[17] - https://vikasa.com/2024/01/29/vasisthasana-pose/
[18] - https://www.spotebi.com/exercise-guide/dolphin-pose/
[19] - https://omstars.com/blog/pose-tutorials/dolphin-pose-ardha-pincha-mayurasana/
[20] - https://www.beachbodyondemand.com/blog/dolphin-pose-yoga
[21] - https://workoutlabs.com/yoga-poses-guide/dolphin-ardha-pincha-mayurasana/
[22] - https://www.yogabasics.com/asana/dolphin/
[23] - https://www.yogajournal.com/poses/warrior-iii-pose/
[24] - https://www.shannonkyeageryoga.com/post/ways-to-practice-warrior-3-for-stability-and-strength
[25] - https://www.youtube.com/watch?v=SZm-tY9uKIE
[26] - https://www.beachbodyondemand.com/blog/warrior-3-pose-yoga
[27] - https://www.leahsugerman.com/blog/crow-pose-bakasana-mistakes
[28] - https://www.shvasa.com/yoga-blog/how-to-practice-bakasana-crane-pose-steps-benefits-contraindications
[29] - https://www.youtube.com/watch?v=xprTwA6x3OE
[30] - https://www.yogajournal.com/poses/crane-pose/
[31] - https://www.yogajournal.com/poses/bridge-pose/
[32] - https://www.tataaia.com/blogs/health-and-lifestyle/health-benefits-of-setu-bandhasana.html
[33] - https://inbalancehealth.ca/2018/04/23/study-bridge-pose-setu-bandha-sarvangasana/
[34] - https://jasonyoga.com/yoga-for-core-strength/
[35] - https://www.sportskeeda.com/health-and-fitness/5-yoga-poses-improve-core-strength
Leave a comment
This site is protected by reCAPTCHA and the Google Privacy Policy and Terms of Service apply.